Step 1: Prepare the Data to be Imported
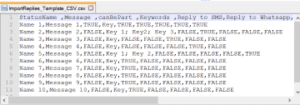
To start, prepare the data to be imported please use the following format
Please ensure that the CSV is formatted with the appropriate fields shown in line 1 of the following screenshot.
We have prepared template to make this process as easy as possible.
DOWNLOAD EXCEL (XLSX) TEMPLATE
Be aware of the following:
HEADER ROW ARE REQUIRED – Header rows are necessary for mapping fields.
ALL FIELDS ARE REQUIRED. – The Import requires that your .CSV file contain all data fields filled in!
Step 2: Export data from Excel to a CSV file by saving it
You can convert an Excel worksheet to a text CSV file by using the Save As command.
- Go to File > Save As.
- The Save As dialog box appears.
- In the Save as type box, choose the CSV (Comma delimited) file format for the worksheet.
- Browse to the location where you want to save the new text file, and then click Save.
- A dialog box appears, reminding you that only the current worksheet will be saved to the new file. Click OK.
- A second dialog box appears, reminding you that your worksheet may contain features that are not supported by text file formats. If you are interested only in saving the worksheet data into the new text file, click Yes.
To best diagnose errors in .CSV files, open the .CSV file in a text editor like Notepad++.
This will allow you to diagnose any problems with the format of the .CSV file.
The .CSV file will appear much different in the text editor than it does in spreadsheet programs. See screenshot above.
Step 3: Transfer a CSV file to your Android Device
Move files with a USB cable
- Unlock your phone.
- With a USB cable, connect your phone to your computer.
- On your phone, tap the “Charging this device via USB” notification.
- Under “Use USB for,” select File Transfer.
- A file transfer window will open on your computer. Use it to drag files.
- When you are done, eject your phone from Windows.
- Unplug the USB cable.
Step 4: Import Your Auto Replies
There are several ways to open the Import dialog
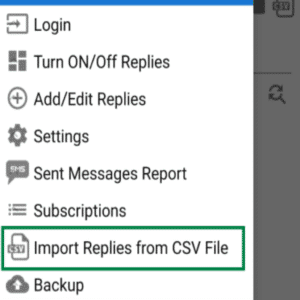
Go to app menu and tap “Import Replies from CSV file”
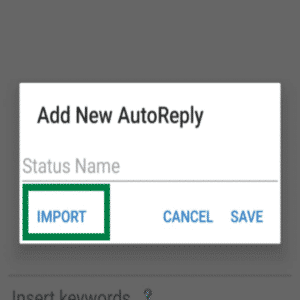
Go to Add /.Edit Screen and tap an import icon in the right up corner
When you enter Add / Edit screen first time
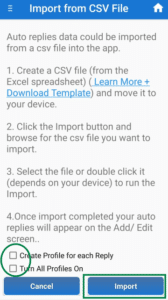
On the Import Screen,
- Set if you would like automatically create time profile (24/7) for each auto reply
- Set if you would like turn all your imported autoreplies on
- Click the Import button and browse for the csv file you want to import.
- Select the file or double click it (depends on device) to run the Import
- The import will happen automatically
- When it is complete, you will see a confirmation message
- If there are any errors during the import, an error message will be displayed at the bottom of the Import Screen


